How-To Enable Reporting on Worklog (Workaround)
In this post, we tackle a common challenge faced by many Atlassian Analytics users: effectively reporting on the Worklog data from Jira.

If you have previously used the workaround in this blog and you want to replace the functionality of the view to leverage the new out-of-the-box capability - you can replace the Custom Table SQL query with this code:
SELECT `Issue worklog`.`issue_id` AS `Issue Id` ,
       "Time Spent" AS `Field Name` ,
       `Issue worklog`.`time_spent_seconds`  AS `Logged Work` ,
       `Issue worklog`.`started_at` AS `Started At` ,
       `Issue worklog`.`authored_by` AS `Author Account Id` ,
       `Account`.`email` AS `Email` ,
       `Account`.`name` AS `Full Name`
FROM `jira_issue_worklog` AS `Issue worklog`
INNER JOIN `account` AS `Account` ON `Issue worklog`.`updated_by` = `Account`.`account_id`
Create Custom Table: "view_LoggedWork"
* The below in no longer required! *
In our latest video tutorial, we tackle a common challenge faced by many Atlassian Analytics users: effectively reporting on the Worklog data from Jira.
While Worklog data are not explicitly loaded into the Atlassian Analytics schema, in this blog, we will share a workaround that allows you to report on Time Spent on specific Jira issue.
Step 1: Create a Custom Table in Atlassian Analytics
To begin extracting the Worklog data, we first create a custom table that calculates each Time Spent entry in the data source into its own row. This approach allows for easier aggregation, filtering and analysis, as each Time Spent is treated as an individual entry.
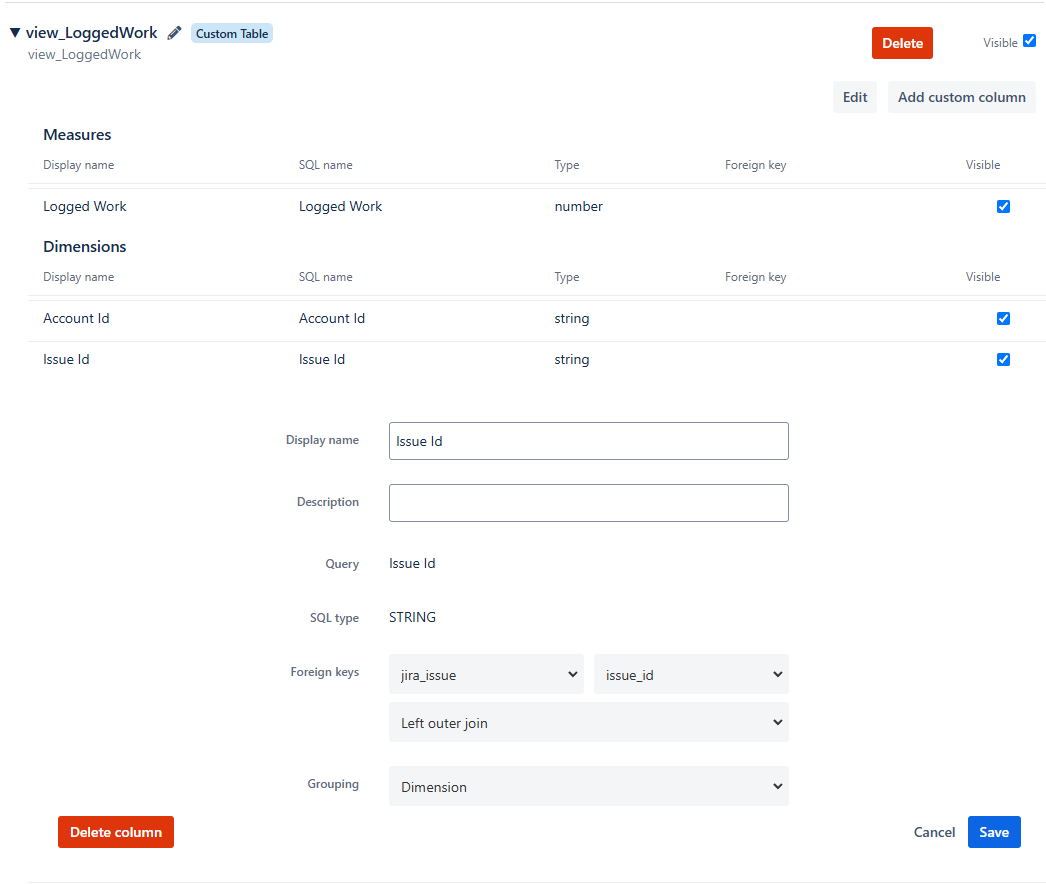
Create a new custom table named 'view_LoggedWork' - using the SQL query below:
SELECT `Jira Issue History`.`issue_id` AS `Issue Id`,
(IFNULL(REPLACE(`Jira Issue History`.`value`, 's', ''), 0) - IFNULL(REPLACE(`Jira Issue History`.`prev_value`, 's', ''), 0)) AS `Logged Work`,
`Jira Issue History`.`started_at` AS `Logged At`,
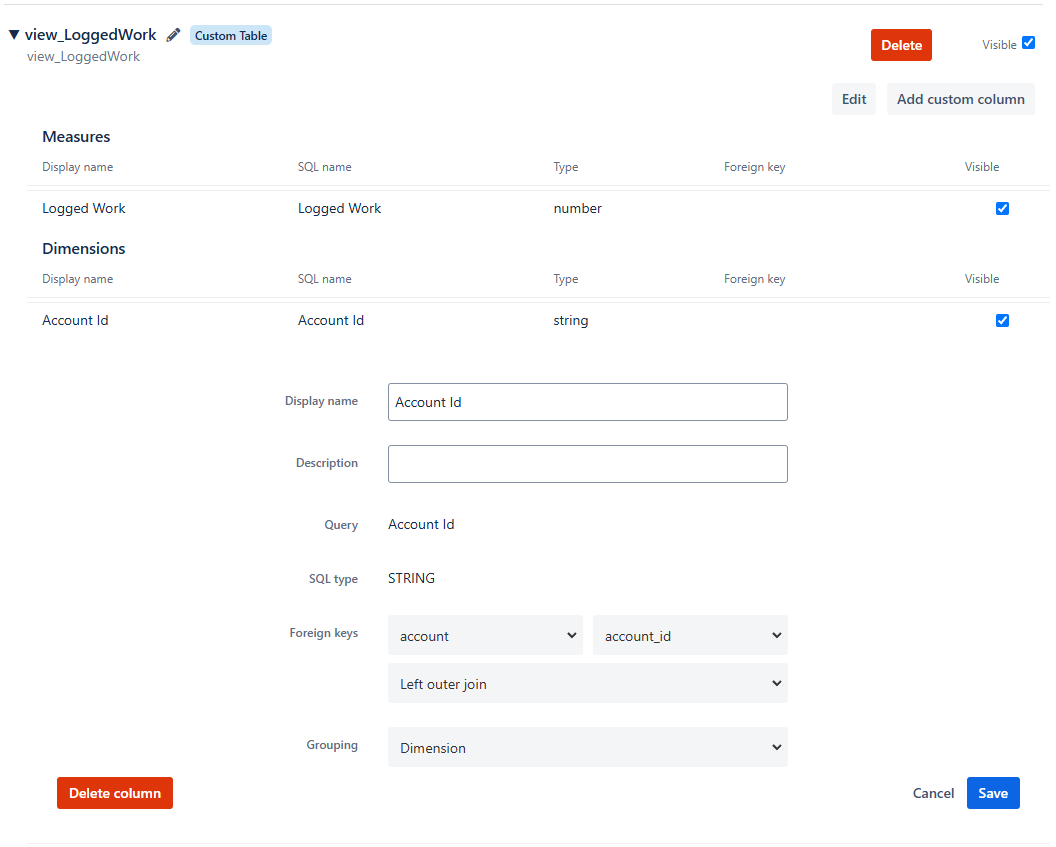
`Jira Issue History`.`author_account_id` AS `Account Id`
FROM `jira_issue_history` AS `Jira Issue History`
LEFT OUTER JOIN `account` AS `Account` ON `Jira Issue History`.`author_account_id` = `Account`.`account_id`
WHERE (`Jira Issue History`.`field_name` = 'Time Spent')Create Custom Table: "view_LoggedWork"
Ensure that the new custom table integrates smoothly with the existing data structure by linking it to the primary tables using appropriate SQL JOINs
Step 3: Test
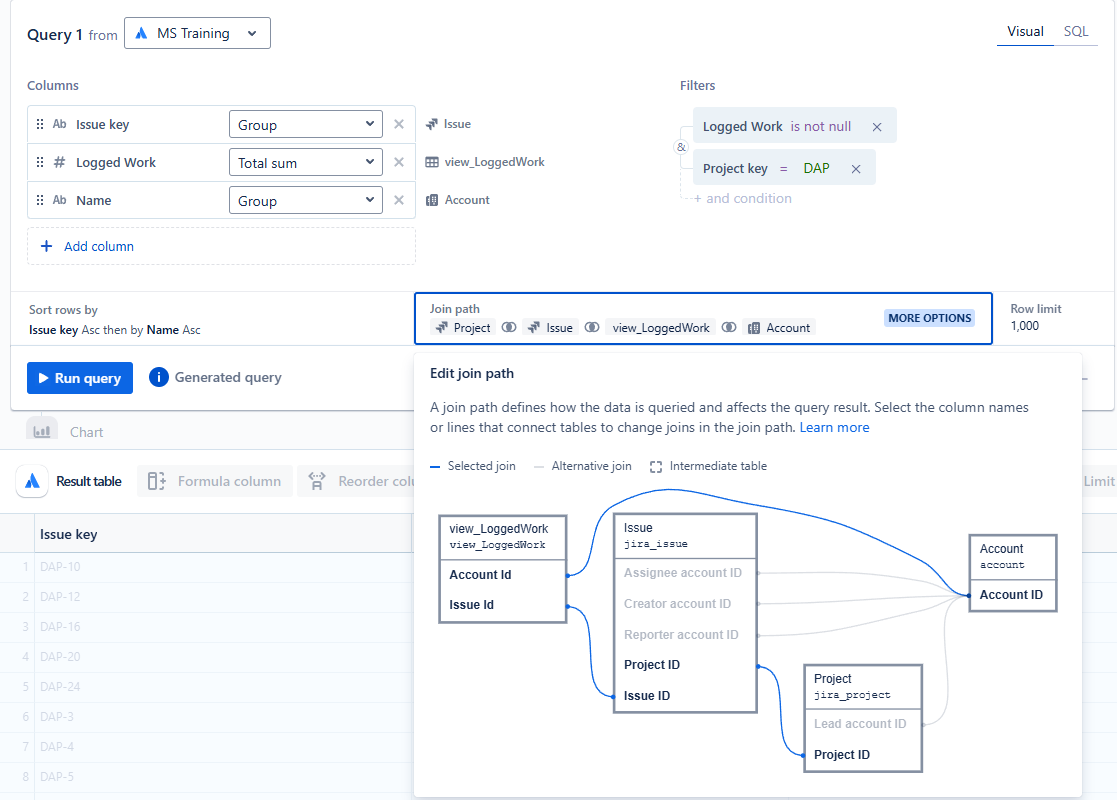
Finally, we test our new structure by creating a chart in the visual SQL editor. This step confirms the effectiveness of our setup and showcases the ease of applying filters and creating interactive dashboards.
- Start by selecting from the Issue table the 'Issue Key', and from the 'view_LoggedWork' table the 'Logged Work', and from the Account table the 'Name' field.
- Adding conditions to filter where 'Logged Work' is not null and 'Project Key' = {Your Project Key}.
- Check the Join Path: This helps confirm that the 'view_LoggedWork' is correctly linked to the Issue and Account tables.
Final Thoughts
With the workaround above, you can create dashboards and reports on the work logged against Jira issues in specific time periods, and can also aggregate based on hierarchy.
As mentioned above, the main limitation is that the Logged Work will be associated with the user that performed the "Log Work" action on the Jira issue and the date/time when the entry was made.